|
( or How to Counterfeit that Board you'll Never be Able to Afford )
|
|
| Every
one of us has that dream board that they wish
they could have in their collection. We can
look day after day on Ebay or post requests
for the board and never get any leads on its
existence. An even worse scenario is seeing
this Ark of the Covenant appear on Ebay week
after week only to have it outbid at the last
second or to never place a bid as the price
is just out of your league. |
|
| So
what are you going to do? Are you going to
continue whacking off like a sicko to images
of a Vallely barnyard or are you going to
do something about it? If you're lucky you
can find a used one and restore it. (for info
on board restoration see previous article).
If you're unable to find even a used board
you're screwed… or are you? |
|
| This
article is intended for those who don't care
if they have the genuine article; they just
want to have that precious image to hang on
the wall. It is not however intended to flood
the market with knock-offs and counterfeits.
If you want to get into that thing you'll
have to look elsewhere because I don't know
anything about making shapes or silk-screening.
Using the technique I'm going to describe
you will NOT get a clone
of your favourite board. You will, however,
be able to paint a fairly good facsimile that
you can add to your collection to get that
board you've always wanted (sort of) but are
just unable to find. |
|
The
first step in this process is to find
a good clear image of the graphic you
want to reproduce. If you know somebody
who has the board you want to copy,
ask them nicely if you can make a photocopy
of the deck. If you don't have direct
access, look around the internet for
the image or post requests. I've been
very lucky and been sent photocopies
of boards, T-shirts, and stickers to
aid in my board restorations and copies.
With any luck you'll find the image
you want. A word to the wise though,
what comes around goes around. If you're
lucky enough to have somebody send you
something, you should be more than willing
to lend them a hand or to send an image
to somebody that asks you.
One
problem people often find with photocopying
a board is that the image is distorted
through concave and reflections. My
best advice for that is to take several
copies of the image while rolling it
across the concave. Taking these images
together, you can align the various
copies into a nice transferable image. |
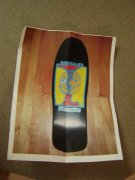
Original picture to work from
|
|
 |
 |
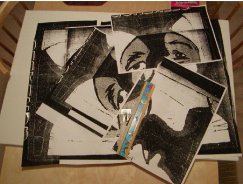
| Enlarged Photocopied Images |
Enlarged Images Taped Together |
|
|
| (NOTE:
For the purposes of this article, I am not
going to transfer an image to a board, but
rather enlarge an image and transfer it to
a canvas to be hung as art.) |
|
| Once
you have the image you want, the next step
is to size it up to a board. Most of us don't
have access to old-school boards we can just
paint on for fun. My best advice is to either
find an old board that's beyond recognition
that you can transform into a canvas, or to
buy a blank new school board to paint on.
The immediate problem with new school shapes
is that they tend to be around 7.5" wide…
generally not big enough for the graphic you
want to duplicate. To accommodate this, shrink
the image down using a photocopier until it
does fit on the Popsicle board. It's either
this, or sacrifice parts of the graphic to
be chopped off at the edges. |
|
| If
you would like to try your hand at actually
painting a graphic onto a large canvas, simply
blow the image up in multiple parts and tape
the pages together into the composite. A hint
here would be to go to an art store and buy
the canvas size you want first. Canvases come
in various sizes and shapes. Like anything
else, there are some standard sizes and they
tend to be MUCH cheaper than having to make
a custom size. If you can, pick something
"off the rack" and then enlarge
the image to fit onto the canvas. It's MUCH
cheaper doing it this way than having to find
a canvas that will fit your image. |
|
| Now
that you have your image copied, re-sized
and ready to go… go do it all over again.
In case you screw up, you'll want to have
a duplicate of the original to work with.
There's nothing worse than screwing up and
then having to go through the whole search
process again of finding the graphic in question. |
|
| Once
you have your board or canvas, prep
it for graphic transfer. For used boards,
be sure to sand it down, fill any scratches
with putty, and spray it with a primer.
I find a light primer background is
better than working with a dark background.
Most canvases in art shops are pre-primed
and ready to go. Just ask a sales rep
if you can start painting on it right
away or if it needs some kind of a prep
coating. |
|
|
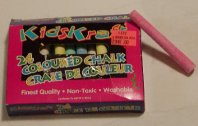
| Taking
the photocopy of the image in question, turn
it over and rub coloured chalk all over the
back of it. You can find coloured chalk really
cheap if you look for it.(Please don't go
stealing it from schools or little kids playing
hopscotch.) |
|
| Rub
the chalk so that you get a solid coating
of it all over the back of the image. Don't
just go lightly; rub it hard to get a nice
thick colouring. I suggest coloured chalk
simply because you can see where you've got
enough and where you've missed much easier
than using white chalk. If you're working
on a coloured background, be sure to use a
colour of chalk that will stand out from the
background. Don't be a dummy and use pink
chalk on a pink board… that's just common
sense. |
 |
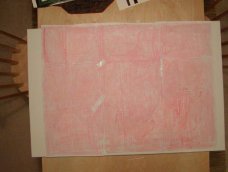 |
| Chalk |
Chalk
rubbed onto back of enlarged photocopy
image |
|
|
| One
crappy part of this technique is that tape
doesn't get coated with chalk. I'd suggest
taping the various pages together in areas
where the graphic isn't going to be compromised.
By this I mean, tape the pages together outside
the areas of detail in the graphic. A quick
and easy way of doing this is to tape the
image together with removable tape. This is
a kind of tape that you can tape pages together
and then remove the tape without ripping the
paper. Again, just ask a sales rep for the
proper kind of scotch tape. Once you've taped
the pages together, hold it up to the light
so you can see where the tape is behind the
graphic. If you can, use smaller pieces that
will fit between lines or in places where
there are no lines for the graphic to be compromised.
Sometimes this can't be helped; in which case
you'll just have to do your best. |
|
| Once
you've covered the back of the pages with
chalk, turn it over onto the board or canvas
and tape it down. For this, don't use that
removable tape. Be sure it's secure and NOT
going to move. If it moves you're screwed.
I find a useful technique is to tape the image
down, and then trace the corners or edges
onto the canvas itself. If you're unlucky
and the image moves, you can return it to
it's original position using these traced
lines as a guide. |
|
| Now
that the graphic is on the canvas/board in
the position you want it, check, check, and
check again that it's REALLY in the position
you want it. It'll suck if you go through
all of this only to find out the image is
crooked or off center. |
|
| Taking
a coloured pen or pencil, begin tracing the
image. This means exactly what I've just said.
Just start going over all of the lines in
the graphic with firm pressure. Using a coloured
pen or pencil will allow you to see at a quick
glance what areas you've gone over and which
you haven't. If you use a black pen or pencil,
you might miss an area unintentionally and
that'll suck. |
|
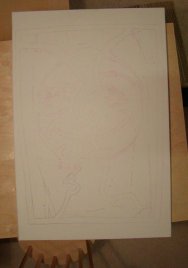
| Once
you've gone over the graphic with a coloured
pen/pencil, you might want to go over it all
again with another colour just to be sure
you've covered it all. Once you're sure, remove
the paper. You should now have chalk on the
board/canvas wherever you traced. It might
be hard to see as the chalk is generally faint.
At this point, begin to carefully trace over
the chalk with a pencil or pen. I prefer pencil
just because it's less permanent than ink
(just in case I make a mistake). Ink is also
hard to cover with paint so again, I'd use
a pencil. While doing this, be careful your
arm or hand isn't rubbing the chalk off in
another area of the image. |
 |
 |
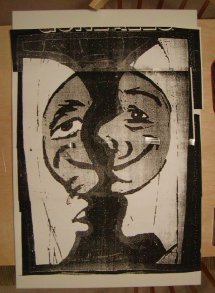
| Chalk traced onto canvas |
Chalk lines re-drawn with pencil onto canvas |
|
|
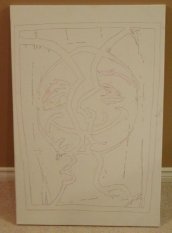
| Once
you've drawn the image onto the board, take
the original and begin comparing. Even with
the closest attention to detail, you may have
missed a few spots. If you have, do your best
to draw those missing lines in free hand.
You don't have to be perfect. You wouldn't
go through all this effort if you were planning
on selling it after you're all done…
and you wont do a good enough job that anybody
is going to be fooled into thinking this is
an original. Let loose and draw!… it
doesn't need to be perfect. |
|
| Now
that you've got everything drawn, it's simply
a matter of thinking back to your early school
years and remembering the cardinal rule; "Stay
within the lines". It's that simple…
just start painting like you were painting
in a colouring book. |
|
| I
use acrylic paint simply because it's cheaper,
is water based, dries quickly, and is available
in an assortment of colours. If you want an
exact colour match you MIGHT be lucky but
in all likelihood you'll have to settle for
"close enough". If you're lucky
enough to get a colour image of the original,
take it with you to the art store and pick
your colours to match it as closely as you
can. Don't trust your memory. What you thought
was orange may simply be a darker shade of
yellow. I would also suggest that you not
be afraid to be creative. Use whatever colours
you want! It's your board so you do what you
like! One way of checking these colours out
first is by doing a quick small painting.
This will allow you to get used to painting,
experiment with your techniques, and to see
what the colours you've chosen will look like
together. |
|
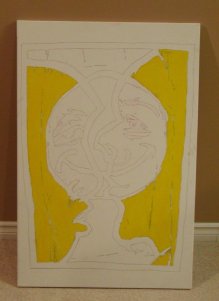
| In
terms of technique, I'd suggest going from
lighter colours to darker colours. Paint one
area of colour completely before going onto
another colour. Using light colours first,
you can get away with going over the lines
of darker colours. You'll be covering these
"mistakes" with a darker colour
later anyway so don't go nuts trying to stay
within the lines. If you do this with a darker
colour, you'll find yourself having to paint
over the dark areas that went outside the
boundaries of the image with white. Trust
me, you don't want to be painting over that
dark colour with the lighter colour. You'll
need multiple coats. Just paint over it with
white and you'll basically be back to square
one with the original white background you
started working with. |
 |
 |
 |
 |
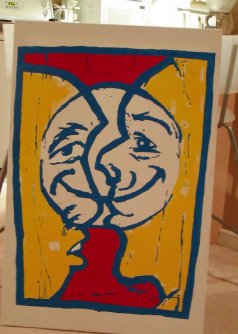
| Yellow
painted first |
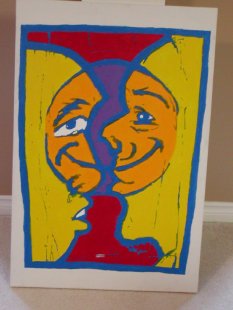
Red
and blue paint added |
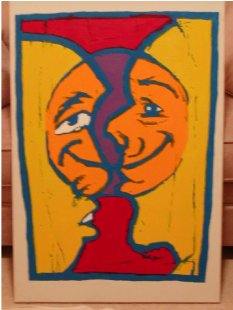
All
colors roughed in |
Finishing
touches |
|
|
| I'd
also recommend re-drawing the lines as you
go over them with paint just so you don't
lose them. It would suck if you kept painting
and covering those lines only to find you
no longer know where the other colours go
as you've covered the drawing!! |
|
| One
last tip, you probably want to stay away from
painting fonts. Unless the words are a major
aspect of the graphic, forget it. Straight
lines are hard to paint and crooked lines
spelling out "Powell Peralta" will
look lame and be a dead giveaway that this
was a "do it yourself" project.
It may not look as authentic, but at least
it won't look as lame as squiggly letters!
It's up to you though....you are the best
judge of your "artistic talent". |
|
| Hopefully
these instructions have been clear and
this technique will work for you as
well as it has for me. Keep in mind,
if you screw up, it's no big deal. You
can always skate the board and scratch
'em to Hell and start over again. Remember,
they're just useless wooden toys. |
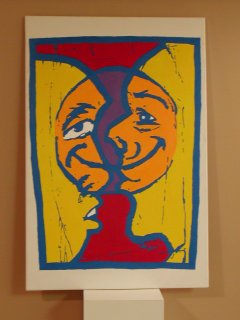 Gonz Final Picture
 |
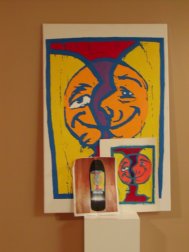 Gonz final with sketch and original
picture
Gonz final with sketch and original
picture |
|
|
 Please visit our friends!